Following on from my previous post about storing stash I just wanted to share some fun easy ways of dressing up your creative 'junk' to make it slightly more eye appealing. I'm not a total neat freak, (honest!) I think it's easier to make stuff around you look pretty so that it can be left around but looking decorative, I guess kind of like a purposeful decorative object but it's more of a practical one. Ok examples....
Plain, (used to be) white mag files. I have a load of these around to keep things in. They're functional but they can also be pretty just by adding a lick of paint.......
I love these colours - I added a couple of new ones recently to add a summery vibe, (yellow and pink). They're Dulux 'Grecian Spa', (turquoise), 'Banana Dream', 'Sexy Pink' and 'Chocolate Fondant' if you were wondering. You can change how your space looks by adding a different colour every now and then. Practical but decorative too, why not? Have fun with your organising!
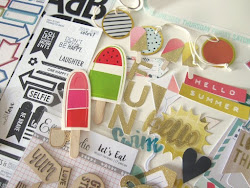
OK so how about stuff that needs to be out all the time? Like say desk clutter, maybe the trusty old glue stick it's functional - yes but it's fairy uninteresting on the eye.
Just by grabbing a couple of decorative tapes and a scrap of paper you can make it all prettified!
Tada.......
Now it looks super cute, even when it's rolled on to the floor, which is usually what happens in my case. Clutter doesn't have to be boring!
Once you have a look round your space for things you can 'craft up' it can get fairly addictive, maybe you can see something now that could be spruced up? Go on have a play!
I'll leave you with an oldie but a goodie. It's something I've had now for a long time and I think I have blogged it before. If you have a load of threads and needles, maybe you just keep them handy for sewing a quick button on a card etc. then this is an idea to keep them organised but in a cute 'prettified' way.....
It's made from a jam jar, an empty clean one , of course! Make a padded top for it by stuffing a ball of fabric with, well stuffing, I think I used cut off bits of felt for mine. To make a ball just cut a circle of fabric out, sew a running stitch around the edge of it, fill the middle with your stuffing and then pull it tight. Glue this to the top of your jam jar lid. Glue a length of ribbon or trimming around the edge of your lid. Tada! That's all there is to it. You can then use the top for your needles and the bottom for your thread. I can't tell you how handy this is and it's another one of those things you can leave out without it looking too much like junk.
There is one area of my creative space that I've not got sorted out yet - it's my ever growing stash of clear stamps. I might have to share on Wednesday.
Happy crafting!
xx Leo


No comments:
Post a Comment