
If you're still looking for a quick gift idea grab some ribbons, (the ones I've used are all from
Ribbon Oasis), cake ingredients and cases and get creating some yummy treats! I was thinking this would also be a perfect way to decorate birthday cupcakes, wedding cupcakes or any other kind of gift cupcake you want to make, best of all it's realllllllyyyy easy!
For these Valentines ones I decided to make the classic Red Velvet cake mix. It's basically just chocolate cake with red food colouring in so it's easy to make but it always looks amazing when you break into them.
Recipe
- 140g of self raising flour
- 2 tablespoons of cocoa powder
- 110ml of milk
- 1 tsp of lemon juice or vinegar
- 1 tsp of vanilla flavouring
- 1 tablespoon of red food colouring
- 60g of butter
- 170g of caster sugar
- 1 large egg
Preheat your oven to 180c. Measure the milk out in a jug and add the lemon juice (or vinegar) vanilla and food colouring in to the milk then set to one side. In a bowl cream the butter and sugar until nice and fluffy and beat in the egg. Next measure out your flour and then add to the flour the cocoa powder and mix it together. Add half the flour mixture to the eggs, butter and sugar mixture, mix in then add half of the milk mixture and stir in. Add the rest of the flour mixture, stir then add the last of the milk mixture and stir again till everything is mixed in together. Your mixture should be fairly scarily read at this stage!

Add your cake cases to your tin and fill the cases with the mixture. It should make 12 smaller cupcakes (using about 2 tablespoons of mixture per case) or about 8 larger ones. Bake for about 20 mins but keep a check on them, when they're done they'll spring back up when you squidge your finger in the top.
When they're done leave them to cool on a cooling rack. You can make your buttercream for the top while they're cooling. I used a standard buttercream with half a capful of red food colouring in it. You could be more adventurous if you like or you could go for something like melted chocolate as your topping, go with whatever you have in the cupboard.
When they're cool you can decorate the cases with the ribbons.
Make sure you add the ribbon before you add the icing. You can get some really cool
self adhesive ribbons from Ribbon Oasis that work really well otherwise you can add double sided tape to the back of your ribbon and then just roll them around the case.
Make some bows tying the ribbon and then glue them on, you can also use little tags or add stickers to decorate them some more if you want.
Finally comes the cool part, adding topping and sprinkles! Spoon on the topping and swizzle round with a spoon or you can pipe it on if you have a piping bag (and can be bothered to clean up after!) and then sprinkle on other bits if you want. I used edible glitter and candy sprinkles that I had left over from Christmas but a gorge traditional topping for red velvet cupcakes is chocolate dipped cherries, wish I had some! Chocolate shavings would look really cool too.

Love this ribbon it reminds me of the love hearts sweets! You can get it
here, the other bits I used are American Crafts Thickers and stickers from KI Memories
There's loads of cool ways you could add decoration to your cases with ribbons so have a play!
xx

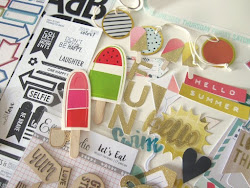
 I used loads of different October Afternoon papers, the 'Rosie's Dinner' clear stamps set, Detours Journalling cards and 'Charleston' rub-ons. Also used a little bit of fabric and some vintage buttons from my stash. The photos are actually little pockets that contain the journalling bit and other little tab bits to lift out. The sun I made with some October Afternoon paper, doodled on and cut out and then a piece glued onto some chipboard and made into a big chipboard button punching holes with my cropodile.
 Sketch#2


 I know it's a loose interpretation of 'bead' lol. I guess it's a pendant kind of bead :). All I did was print some images on to fabric transfer paper (the kind that you iron on and peel off). The images I used are all downloads from
 The heart beads are hematite and the large red beads are cherry quartz, the smaller beads are smokey quartz. I just strung them on some Stretch Magic so it can be used as a necklace or doubled up and worn as a bracelet. Will defo be playing along some more with those challenges.
 Side two,


